Home » Resources » How-to Guides » Drupal Installation Guide
Drupal Installation Guide
Find Data8’s Drupal Installation Guide here to get started with your data validation journey. Our Drupal module supports the following features:
- PredictiveAddress
- Phone Validation
- Email Validation
Installation
The Data8 Drupal module supports PredictiveAddress, Email and Phone Validation for forms built using the Drupal Form API as standard. Validation will require jQuery Validation to be installed as well. For validation feedback on field change, we recommend installing the jQuery Client Side Validation module.
The Data8 Module can also be used with the Webform and Address modules. These will need to be installed separately before the Data8 Webform and Data8 Address modules can be activated.
Drupal version 10.3 and below
To install the Data8 Drupal module on your site, download the plugin from the integration main page. In the admin area of your site, go to Extend and click “+ Add new module”. Select the Data8.zip file you downloaded and follow the prompts to activate the module.
Drupal version 10.4 and above
To install the Data8 Drupal module on your site using Drupal version 10.4 and above, download the plugin from the integration main page. Take the subsequent Data8.zip file, and copy it into your Drupal modules directory, more information on how to do this can be found here.
Drupal version 11.0
Unfortunately, our modules are no longer compatible with Drupal version 11.0 and later.
Configuration
Once the Data8 module has been installed, you will be able to configure the module by going to Administration -> Configuration and you will find the Data8 Settings link in the Web Services section of the page.
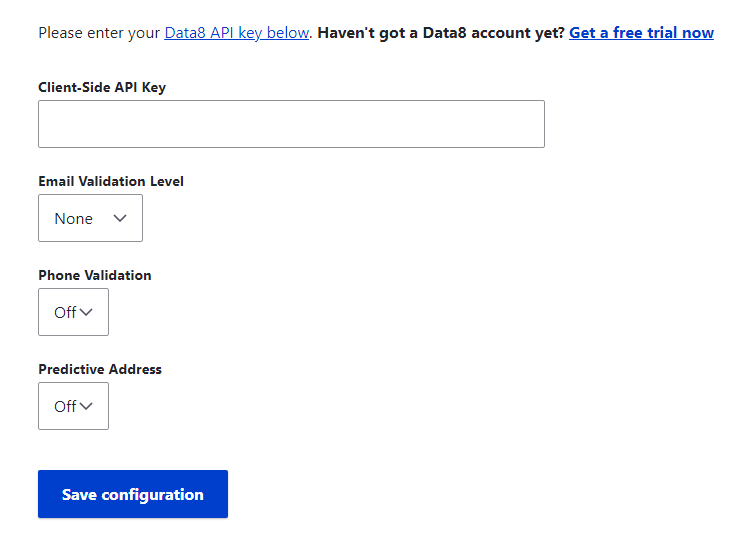
From here you can add your Client-Side API key and select which services you want to use.
Telephone Validation Options
You can use any of the options available for Phone Validation by adding them to the Options box which will become visible when Phone Validation is enabled.
For example, enter the following into the Phone Validation options box to invalidate any unlikely numbers even if they are technically valid, such as 07000000000:
ExcludeUnlikelyNumbers: true
Email Validation Levels:
When Email Validation is enabled, all suitable email address fields are validated automatically. The level of validation to apply to entered email addresses can be selected from a drop down on the settings page. See the table below for information on each level.
| Level | Description |
|---|---|
| Syntax | The supplied email is checked to ensure that it meets the standard email address format. This is the quickest option and would reject such incorrect email addresses as “noone@nowhere” and “N/A”, but would accept incorrect email addresses that are correctly formed but that do not include a valid domain name such as “[email protected]”. |
| Domain | The supplied email is checked to ensure that the domain name (the part to the right of the @ sign) exists and is set up to receive email. This is still normally very quick, but can take a few seconds in some cases. This check would reject incorrectly formatted email addresses in the same way as the Syntax check, and would also reject a misspelled domain name such as “[email protected]”. It can also detect when a domain name exists but does not handle email, such as “[email protected]”. It does not verify that the part of the email address to the left of the @ sign exists. |
| Server | In addition to the Domain level checks, validates that at least one of the mail servers advertised for the domain is actually live. |
| Address | In addition to the Server level checks, validates that the mail server accepts mail for the full email address. |
PredictiveAddress Options
When the PredictiveAddress service is enabled, the PredictiveAddress Options box will become visible. This box can be left blank to use the default configuration of PredictiveAddress. However, should you wish to customise your integration, you can do so by entering any combination of the options available for the PredictiveAddress service.
For example, enter the following into the PredictiveAddress options box to detect the initial country in the PredictiveAddress search, from the users IP address:
initialCountry: auto
Validation Setup
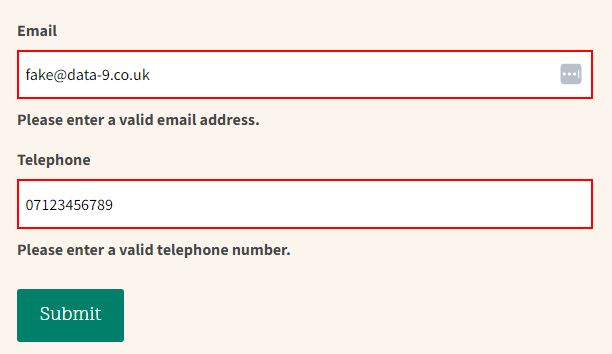
Once you have your settings configured, and jQuery validation added to your site, validation will be applied to all telephone and email fields.
As standard, validation will run on form submit, by adding the jQuery Client Side Validation module validation can be run whenever a user clicks away from the input, providing real time feedback.
PredictiveAddress™ Setup
The Data8 Module can be used to provide PredictiveAddress™ to Webforms, Address Module elements and custom forms built using Drupal’s Form API.
Webform
To add PredictiveAddress™ to Webforms, add a “Basic Address” element to your form and enable the fields you want to include. Make sure to use the “Country Codes” option if you want to include country as part of PredictiveAddress™ .
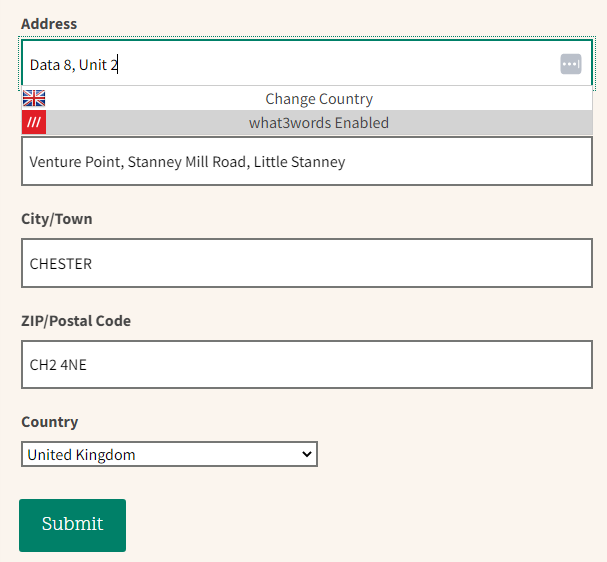
Address Module
To use PredictiveAddress™ with the Address module, add the address element to your form, enable the fields you want to include in PredictiveAddress™ and select a default country value.
The Data8 module also provides support for a single address search input, with the other fields to be revealed once an input has been selected, as in the below example.
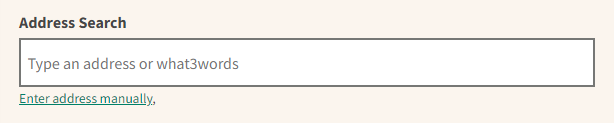
To implement this functionality, add a standard text field to your form above your address and set the Machine Name for this field to “field_[Name of Address Field]_address_search and include the following as help text:
<a id="show-[Name of Address Field]" onclick="" >Enter address manually</a>
Form API
PredictiveAddress™ can be added to forms built using Drupal’s form API by adding custom classes to the input fields. The options of field that can be used are listed below. Select which fields you would like to be part of your address and the Data8 module will detect which fields have been included and adjust it’s response accordingly.
| Class Label | Description |
|---|---|
| d8pa_search | Search field for PredictiveAddress™, can be combined with another class e.g., d8pa_address_line1 if you want search to be attached to the first line of the address. |
| d8pa_address_organisation | The field should contain the company name, where available |
| d8pa_address_building | The field should contain the building name and/or number |
| d8pa_address_line1 – d8pa_address_line 6 | The field should contain the corresponding line of the address |
| d8pa_address_town | The field should contain the town name |
| d8pa_address_county | The field should contain the county name |
| d8pa_address_postcode | The field should contain the postcode |
| d8pa_address_country | The field should contain the country name or code |
| d8pa_address_what3words | The field should contain the what3words that the user searched for |
To add a second PredictiveAddress™ input to your page, append “_2” to all class names e.g., d8pa_search_2, d8pa_address_line1_2. You can add further addresses by continuing with this naming convention i.e., append “_3” for a third, “_4” for a fourth etc.