Home » Resources » How-to Guides » Click Dimensions Installation Guide
Click Dimensions Installation Guide

Our Click Dimensions integration supports the following services:
- PredictiveAddress
- Email Validation
- Phone Validation
- Name Validation
Step 1: Open Code Editor
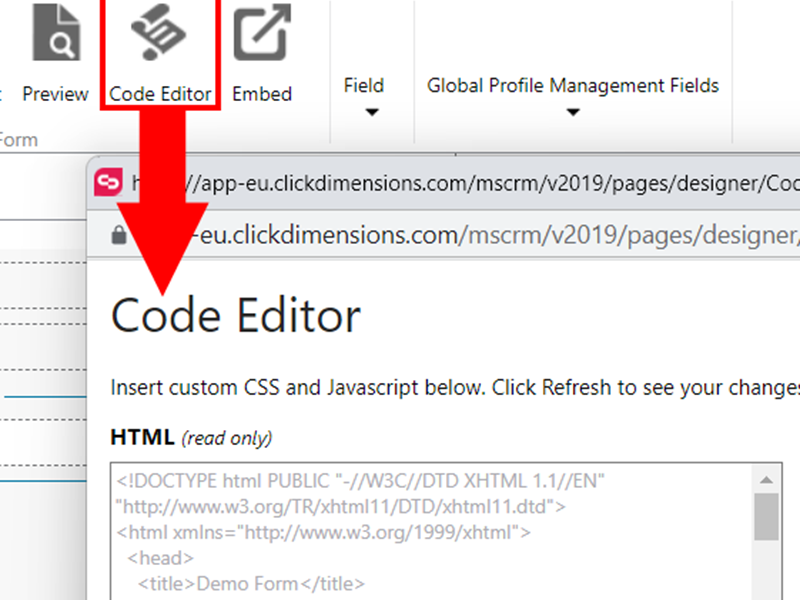
To integrate Data8 Validation or PredictiveAddress into your ClickDimensions form, select the form record, click “Design” in the ribbon and then click “Code Editor” in the form designer.

Step 2: Generate your configuration code using the form below
Simply fill out the form and click generate to get your custom code.
Each validation service requires the necessary credits to function.
An API key is required to use any of the validation or PredictiveAddress services. You can generate one from the Dashboard, under the Validation tab or by clicking here (please note, you need to register to access the Dashboard). Your API key must be enabled for use on the domain name entered as the “Web content CNAME” in your ClickDimensions configuration (usually web.yourdomain.com)
Step 3: Paste code in Javascript section
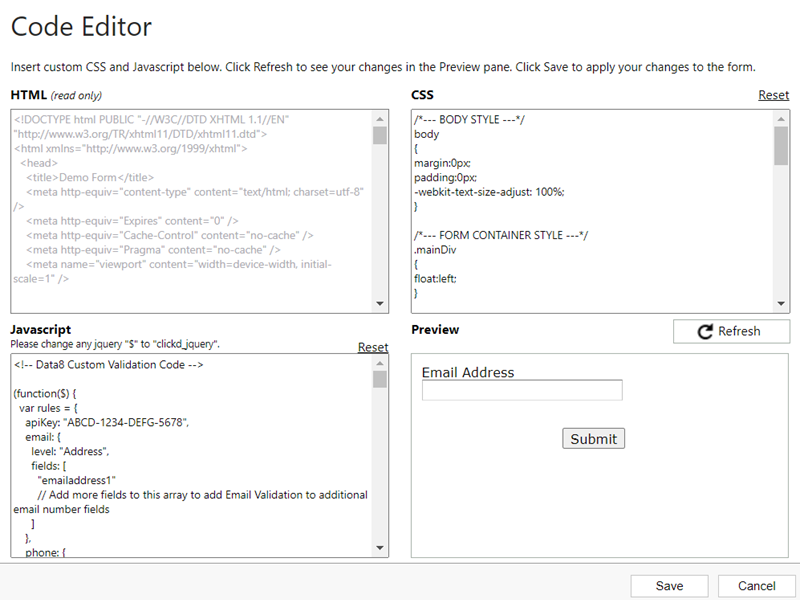
Having generated your code above, you can now copy and paste this into the Javascript section of the ClickDimensions Code Editor window.
Should you ever wish to remove the Data8 Validation or PredictiveAddress from your ClickDimensions form, simply remove this code from the code editor again.

That’s it! Data8 Validation and Address Capture has been applied to your form, depending on the options you selected.
Additional Configuration
To configure the validation to suit your needs, open the Code Editor and change the value of the variables to suit your needs. An API key is required to use any of the validation or PredictiveAddress services. Each validation service requires the necessary credits to function.
PredictiveAddress Options
When the PredictiveAddress service is enabled, the PredictiveAddress options will be encoded at the top of the generated script according to the options selected on this form. However, should you wish to customise your integration, you can do so by entering any combination of the options available for the PredictiveAddress service.
For example, add the following into the PredictiveAddress options box to detect the initial country in the PredictiveAddress search, from the users IP address:
initialCountry: "auto"
Validating Additional Fields
To attach the PredictiveAddress service to more than one address field, add more entries to the generated fields array. For example:
					fields: [
  {
      street1: "address1_line1",
      street2: "address1_line2",
      street3: "address1_line3",
      city: "address1_city",
      stateorprovince: "address1_stateorprovince",
      postalcode: "address1_postalcode",
      country: "address1_country"
  },
  {
      street1: "address2_line1",
      street2: "address2_line2",
      street3: "address2_line3",
      city: "address2_city",
      stateorprovince: "address2_stateorprovince",
      postalcode: "address2_postalcode",
      country: "address2_country"
  }
],
...
You do not need to specify each of the field mappings above for an address. The only required lines are “line1” and “postcode”. The rest can be removed if necessary.
Email and Phone Validation can be applied to multiple fields by adding the field names to the fields array in the corresponding section of the generated script configuration, e.g.:
					email: {
  level: "Address",
  fields: [
    "emailaddress1",
    "emailaddress2"
  ]
}
Salacious Names validation can also be added to multiple sets of name fields:
					name: {
  fields: [
    { firstname: "firstname", lastname: "lastname" },
    { firstname: "new_customfirstname", lastname: "new_customlastname" }
  ]
}
Usage
When PredictiveAddress is enabled, you will start seeing autocomplete suggestions displayed as you type in the Street 1 field. Select an address from the autocomplete list to automatically fill out the remaining fields.
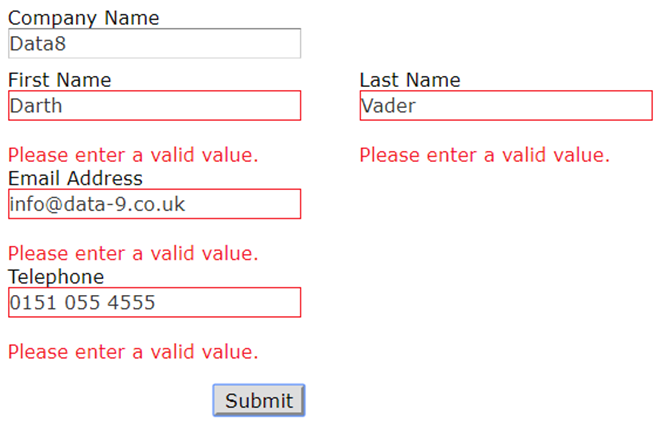
If you have configured one of the other validation services, the data will be validated automatically as the form is submitted. Any errors will be highlighted using the standard ClickDimensions error display and will need to be corrected before the form can be submitted.

