Home » Resources » How-to Guides » Dataverse & Dynamics 365 Installation Guide » Data8 Business Insights Hub » Business Insights Installation Guide » Business Insights Adding to your Form
Data8 Business Insights: Adding Business Insights to your Form
You can add custom controls, or components, to your form using the maker experience form editor. There are occasions when the custom control isn’t listed in the new experience – in this case you either have to wait and come back, or “switch to classic” and follow the “classic form editor” part of the guide below.
Note for better formatting, we also recommend hiding the label, although this is optional.
Add the “Company” field (logical name of “data8_companyid”) onto your form. Once added, select it so it takes the focus and using the navigation bar on the right of the page, scroll to the very bottom for the “Components” section. Select “+ Component” and choose the “Data8 BusinessInsights Lookup” option.
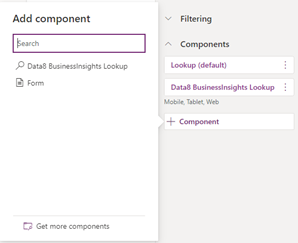
From here you can configure the control and you have 2 configurable options here.
1- Display Fields Override
By default, the control will show the latest credit rating, latest credit limit and when the company was most recently modified inside your environment. If you wish to display other fields, you can input the logical names of the fields on the “Company” table separated by a comma – for example if you wanted to show the company status as well as the credit information, you would input
“data8_companystatus, data8_latestcreditrating, data8_latestcreditlimit”.
2- Hide Remove Toggle
This is an additional option that will hide the “Remove” button when a company has been selected. By default, “Remove” is visible for all users.
Adding Real Time Form Updates
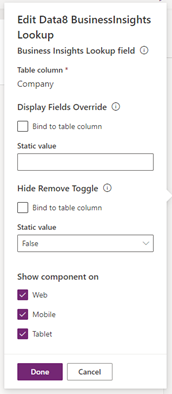
Business insights provides an option to update form fields as you enter a business based on the field mappings set up in the configuration. Select the “Company” field shown above, then select “Form Libraries” from the left-hand menu. Select “data8_businessinsights.js”.
If you do not see this file, then click “Add library” and search for the “data8_businessinsights.js” file then click add.
Next, on the right-hand side with the “Company” field still selected, create a new “Event Handler”.
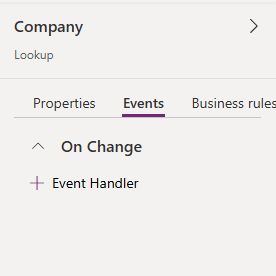
Select ”On Change” for the Event Type. For the library, select the ”data8_businessinsights.js” file. Enter ”onBusinessInsightsChange” as the function name. Ensure that ”Enabled” and ”Pass execution context as first parameter” are selected.
Using the Classic Form Editor
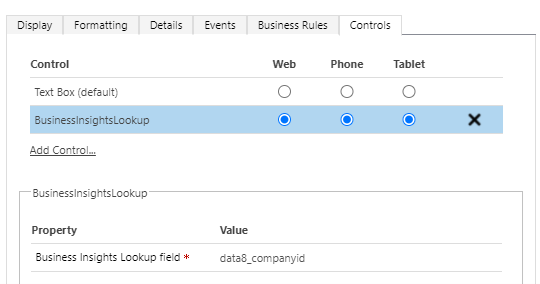
Add the “data8_companyid” column onto your form. Once added, double click it and select “Controls” from the top tabs and select the “Data8 BusinessInsights Lookup” control. When you have finished, save and publish the changes to your form.
Adding Real Time Form Updates Using the Classic Form Editor
Select “Events” from the top tabs and select “Form Libraries” to check if “data8_businessinsights” is there. If not, click “Add” and search for it.
Next, expand the “Event Handlers” which is below the “Form Libraries”. Select the “Company” control and the “OnChange” event and click “Add”.
Select “data8_businessinsights.js” for the library and then enter “onBusinessInsightsChange” as the function. Select “Enabled” and “Pass execution context as first parameter” then click OK.
