Home » Resources » How-to Guides » Salesforce Installation Guide
Salesforce Installation Guide
Find Data8’s Salesforce Installation Guide here to get started with your data validation journey. Our Salesforce integration supports the following services:
- PredictiveAddress
- Email Validation
- Phone Validation
- Name Validation
- Bank Validation
- Business Insights
- Telephone Preference Service
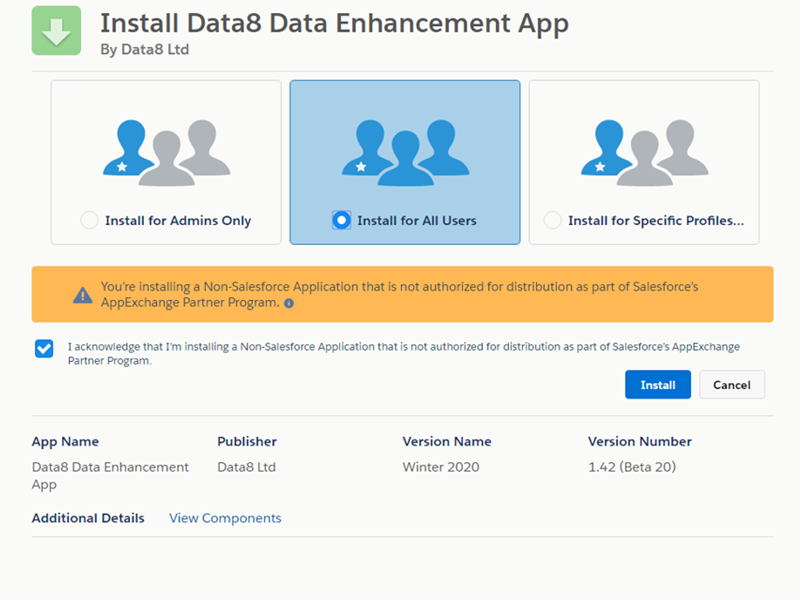
Step 1: Install the package
For Sandbox installation, replace login.salesforce.com in the url with test.salesforce.com.
- Click the button above to be redirected to the installation page.
- Sign into your organisation and click the ‘Install’ button.
- Agree to allowing requests to the webservices.data-8.co.uk domain as this is necessary for our validation APIs to work.
- Once you see the installation complete screen, click the Done button.
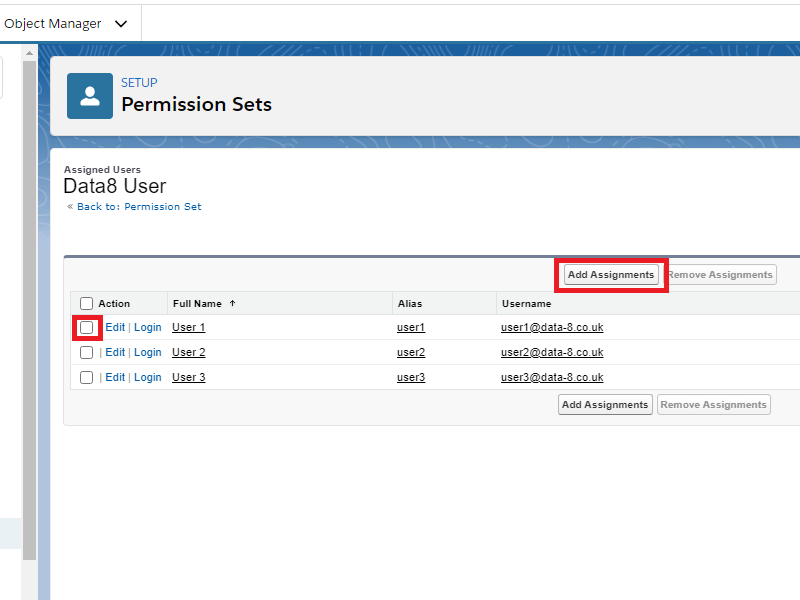
Step 2: Assign User Permissions
Users will need access to our custom objects and custom settings to store and read configuration options and mappings.
- Open ‘Setup’.
- Search for the ‘Permission Sets’ settings
- Locate and click on the ‘Data8 User’ permission set.
- Click the ‘Manage Assignments’ button
- Click the ‘Add Assignments’ button
- Select all users that will be using the Data8 services.
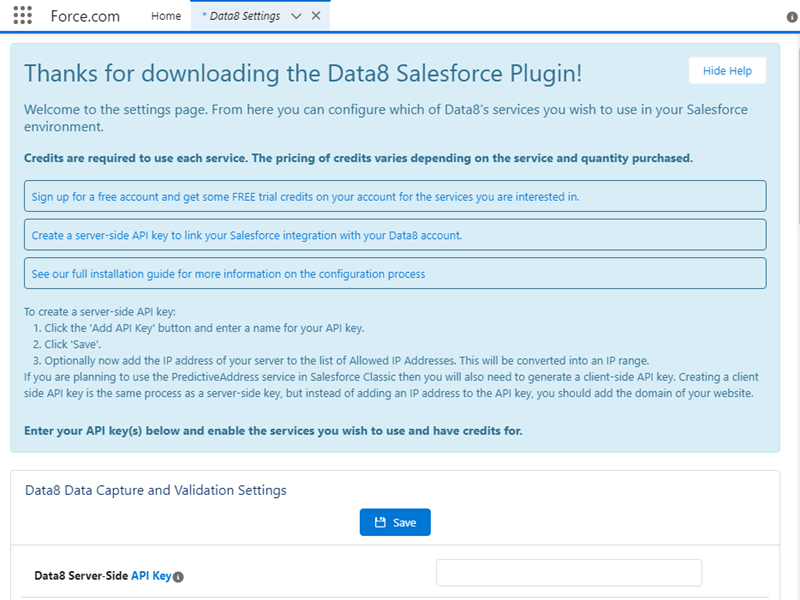
Step 3: Data8 Settings Page
Configure settings to suit your needs, whether using one of our services, or a combination of several.
The settings page contains all of the configuration options for Data8 services within Salesforce. It can be accessed by searching ‘Data8’ or ‘Settings’ in the app launcher quick search bar.
There are many options available on this page that control how the Data8 services work. The link below explains each option and should help getting the plugin set up to suit your needs.
Our ‘Record Form Override‘ method is an all-in-one solution which can be used to add our validation, address capture and TPS checking services to the point of data entry in real-time. Simply enable the services you wish to use in the ‘Data8 Settings’ page as described in the Configuration section above.
Use this integration method to prevent invalid data entering your system, replacing the standard form used for creating and editing records with a version containing our services. For both Lightning and Classic users, this method implements Data8’s services at point of data entry, preventing invalid data entering your system whilst maintaining your customisations and supporting custom fields and objects. This means that our integration will still make use of your custom form layouts. However you will lose the ability to edit records inline. Supported services: PredictiveAddress, Bank Account Validation, TPS Checking, Email Validation, Phone Validation, Telephone Formatting, Name Validation.
Alternatively, integrate our services individually through Lightning components, custom buttons and visualforce pages. See the individual service pages below for guidance on setting these integrations up. Alternatively, check our User Guide for further information on integrating our lightning components into your Salesforce environment.
Use this integration method to add our services to the lightning record pages you see when viewing a record. We have built several drag-and-drop lightning components which quickly and simply integrate our services into any object. There are also custom buttons for Predictive Address and Business Insights which can be added to the form layout and some legacy visualforce pages which can be used to perform validation checks and display results of checks on the record.
Step 4: Choose Integration Method
The next step is to decide which integration methods suit your needs. Use any or all of the following.
See the specific pages below for help with each part of the configuration.
Configuration (Settings Page)
PredictiveAddress Configuration
Bank Validation Configuration
Legacy Validation Implementation Method
Business Insights Configuration
All integrations are compatible with Salesforce classic, other than the Lightning Components.
Once you have configured your Salesforce environment to make use of the integrations you wish to use, read our User Guide for information on how to use our services.